


Today, we have the Quickest and Easiest way to Install PIP, Python, Tensorflow 2.0, OpenCV, and NumPy in Windows Easily without any third-party software. There are multiple ways to install Python, PIP, Tensorflow 2.0, OpenCV in Windows but here we are going to see the easiest to follow with steps and images for your reference.
Install Python In Windows-
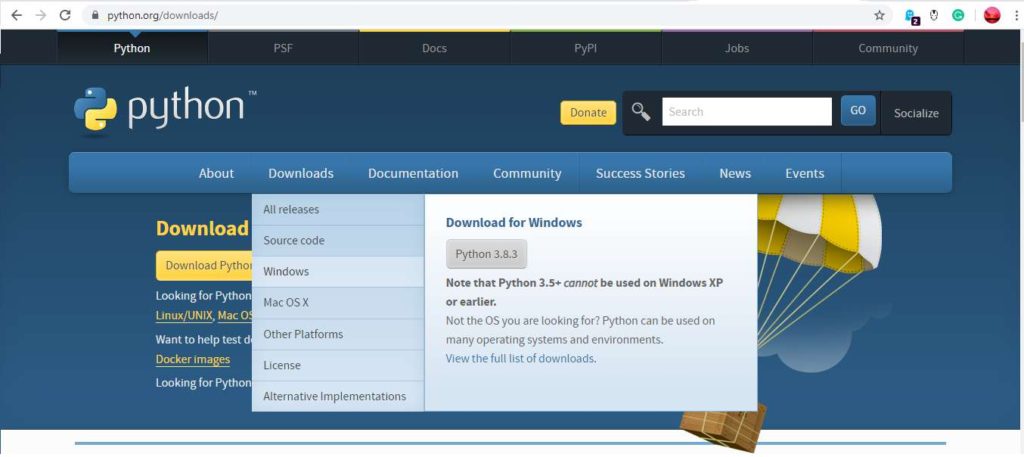
Step 1– Download Python Web-based Installer or Python Executable Installer from Python.org. At the time of writing this article, the latest version of stable Python is Python 3.8.3. Even if the newer versions are stable while you are following these steps, the steps will be similar if not ditto.
I would recommend you to download the Python Executable Installer to install Python in Windows.

Step 2– Run the downloaded Python Executable Installer. You will be prompted with the Dialogue box for installation. Choose the “Install Now” option as it will be the easiest and fastest method.
IMP: Check both the options “Install Launcher for All Users” & “Add Python 3.8 to PATH”. The Path option will add Python to Environment variables so that you can run Python via Windows Command Prompt.
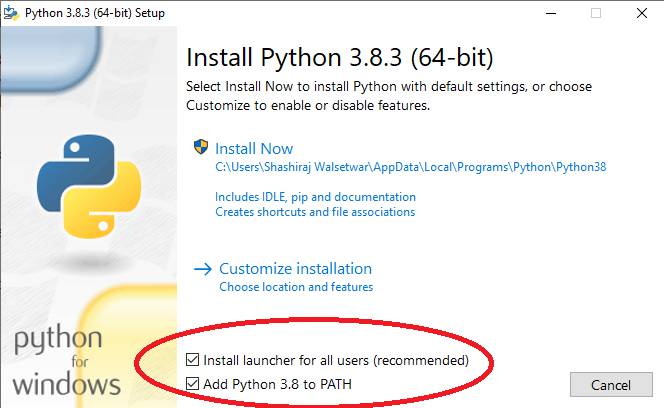

Step 3– Click on Install. The installation may take 30 secs to 2 mins depending on your System.
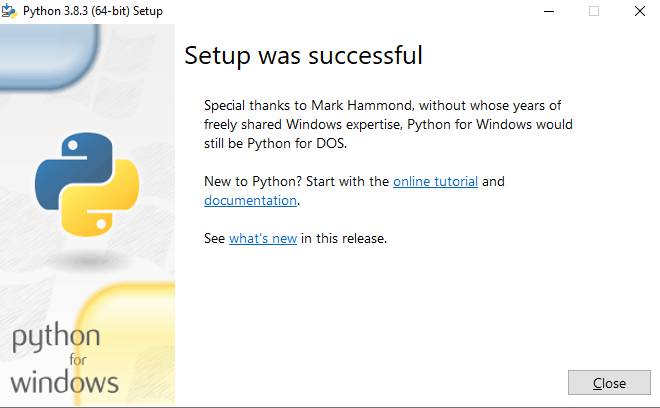
Step 4– Hopefully the installation would be successful and you will get another prompt with an option “Disable Path Length Limit”, I would recommend selecting that option and thereby removing the path length limit. It will potentially save you time in the future on debugging an avoidable issue and error like below:
error MSB3541: Files has invalid value "long\path\filename". The specified path,
file name, or both are too long. The fully qualified file name must be less than
260 characters, and the directory name must be less than 248 characters.
Step 5– Once you click on “Disable Path Length Limit”, You will be prompted with Successful setup box like below-

Also, Read- 8 Most Secure Browser to Stay Anonymous & Safe
Now to Verify Installation of Python-
Step 1- Open Windows Command Prompt and type python. You will see the python executed as below-


Step 2- You have successfully installed Python on Windows. Now try and run the basic “Hello World ” code like below-


Install Pip In Windows-
If you have performed all the above steps, then you would already have installed pip. To verify the installation, open the command prompt and type pip –version. It will give you the pip version you have installed and its location as below-


If you have not install pip in your system automatically, please follow below steps to manually install pip.
Step 1- Download get-pip.py on your computer.
Step 2- Open the Windows Command Prompt and navigate to the folder containing get-py.py you downloaded (Keep the get-pip.py on Desktop for ease, I have done the same).
Step 3- Run the command python get-pip.py as below-


Step 4- Verify installation of a pip by typing pip –version, it will display the version of pip installed on your computer like below-


Also, Read- 5 Best Resources to Learn & Get Programming Certification for Free
Why PIP is required?
pip is a package installer for Python. You need pip to install any third-party package or python package to your computer.
Install OpenCV & Numpy In Windows-
OpenCV (Open Source Computer Vision Library) is a Machine learning software library used for computer vision applications like face detection, face recognition, etc. This library is widely used for operations on images and videos.
There are multiple ways to install OpenCV but I will show you the simplest way to install using the Windows command prompt. You will need PIP installed successfully for this method.
Step 1- Open Windows Command Prompt
Step 2- Run the command pip install opencv-contrib-python


Step 3- The command will install the OpenCV and NumPy in your System. You will see the result as below-


Step 4- To verify the successful install of OpenCV, use the below commands in Windows Command Prompt-
- python
- import cv2
- import numpy


If there are no errors while importing, you have successfully installed OpenCV and Numpy. For any additional libraries, use the command pip install <library_name>. This command will work for all the libraries except a few which will have a dependency on other libraries.
Also Read- Top 5 Professional Freelance Websites for Beginners To Earn Money
Install Tensorflow 2.0 In Windows-
TensorFlow is a free and open-source software library for dataflow and differentiable programming across a range of tasks. It is a symbolic math library and is also used for machine learning applications such as neural networks.
Step 1- Open Windows Command Prompt
Step 2- Run the command pip install tensorflow


Step 3- The command will install TensorFlow 2.0 latest stable version and you will get the result as below-


Step 4- To verify the successful install of Tensorflow, use the below commands in Windows Command Prompt-
- python
- import tensorflow as tf


If you see no errors while importing TensorFlow 2.0, you have successfully installed TensorFlow.
So, here you have successfully installed Python, PIP, OpenCV, and Tensorflow in the easiest possible way.
If you encounter any issues/errors for installing Python, PIP, OpenCV, and TensorFlow, Please let us know in the comments below and we will get back to you with a solution.
Also, Read- 29 Best Software Development IDE for Every Programmers & Developers
For More Amazing Quickest and Easiest Methods, Click Here.


It’s perfect time to make a few plans for the future and it’s time to be happy.
I have read this post and if I may just I wish to counsel you some attention-grabbing issues or suggestions.
Maybe you could write subsequent articles referring to this article.
I desire to read even more issues about it!
I was curious if you ever thought of changing the page layout of your site?
Its very welll written; I love hat youve got to say.
But maybe you could a little more iin tthe way of content so people could
connect with it better. Youve got an awful lot of text
for only having oone or two images. Maybe you could space it out better?
My web blog: gloucester conservatories (Cecile)